![[AI] MobileFaceSwap 환경 설정 2](https://img1.daumcdn.net/thumb/R750x0/?scode=mtistory2&fname=https%3A%2F%2Fblog.kakaocdn.net%2Fdn%2Fbp3zvu%2FbtrS3p6oZc8%2FLjoa0fHrvHVkJSSLkXDsMK%2Fimg.png)
지난 포스트에서 필요한 환경 설정이 완료되었으니
이번에는 추론을 해볼 것이다.
https://github.com/Seanseattle/MobileFaceSwap
GitHub - Seanseattle/MobileFaceSwap: MobileFaceSwap: A Lightweight Framework for Video Face Swapping (AAAI 2022)
MobileFaceSwap: A Lightweight Framework for Video Face Swapping (AAAI 2022) - GitHub - Seanseattle/MobileFaceSwap: MobileFaceSwap: A Lightweight Framework for Video Face Swapping (AAAI 2022)
github.com
학습된 데이터를 클라우드에서 다운로드 받아주자.
tar 파일로 다운로드 받아지면
tar -xvf [파일명.tar]cmd 에서 이 명령어로 해당 파일의 압축을 풀어
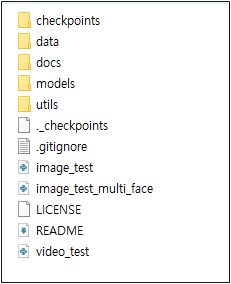
클론 한 로컬에 checkpoints 폴더를 넣어준다.
로컬 루트에 data 폴더를 만들어
원하는 input 이미지 두 개를 넣어보자.
그리고 깃허브에 나와있는 테스트 코드를 실행시키자.
python image_test.py --target_img_path data/xxx.png --source_img_path data/xxx.png --output_dir results --use_gpu Truexxx.png 에 data 폴더에 넣어둔 input 이미지를 각각 설정해준다.
실행해보면!!!
실패..!
오류 코드를 확인해보면
ImportError: Unable to import dependency onnxruntime.
이런 오류가 뜬다.
dependency 가 필요하다고 하니
onnxruntime을 설치해보자.
https://onnxruntime.ai/docs/execution-providers/CUDA-ExecutionProvider.html
NVIDIA - CUDA
Instructions to execute ONNX Runtime applications with CUDA
onnxruntime.ai
위 링크에서 확인해보면

이런식으로 정리가 되어있는데,
내 버전을 확인해서 설치하면 된다.

내 버전은 이렇게 된다.
이전에 cuDNN의 버전을 7.6.3으로 설정해두었으니 업그레이드 해줘서 맞춰준다.
혹시 파이썬 버전이 3.9라면 3.8로 다운그레이드 해주자.
1.6.0 버전이 설치가 되지 않아 아래 링크에서 직접 다운로드하여 설치했다.
https://pypi.org/project/onnxruntime/1.6.0/#files
onnxruntime
ONNX Runtime Python bindings
pypi.org
본인의 파이썬 버전에 맞춰서 다운로드 해주면 된다.
( 3.8이라면 38 )
해당 파일을 설치하는 방법은
python -m pip install "해당 파일"
처럼 입력하면 된다.
'AI > ComputerVision' 카테고리의 다른 글
| [AI - Review] MobileFaceSwap 사용하기 (1) | 2022.12.08 |
|---|---|
| [AI] MobileFaceSwap 환경 세팅 (0) | 2022.12.06 |